iPod Classic SSD Setup
17 November 2023
Replacing an iPod Hard Drive
Over time the original iPod hard drives eventually fail. They are fragile component and have lead a rugged life being inside a portable device. This can result in playback issues, beeping noises, and more commonly they prevent the iPod from starting.
In this situation it's best to replace the mechanical hard drive with a solid state drive (SSD). iPod SSDs come in many forms, and below are some of the more common setups:
- iPod Classic 3rd, 4th generations
- Compact Flash adapter + CF card
- Compact Flash adapter to SD/microSD + SD/microSD card - iPod Mini
- Compact Flash card - iPod Classic 5th, 6th, 7th generations
- mSATA adapter + mSATA stick
- SD adapter + SD card
iPod Replacement Parts & Adapters
Restoration Problems
If you've replaced the hard drive in an iPod it's common to receive an error when trying to restore the iPod in iTunes (e.g. error 1429). Sometimes the iPod may even get stuck in a boot loop and won't mount at all in iTunes.
For me the easiest way to avoid these problems has been to formatting, and then restoring the new storage device before installing it within the iPod.
SSD Setup & Restoration
To prepare your new storage device for use in your iPod follow the steps below.
* These may vary depending on the versions of Disk Utility and iTunes you are using.
Formatting your storage device
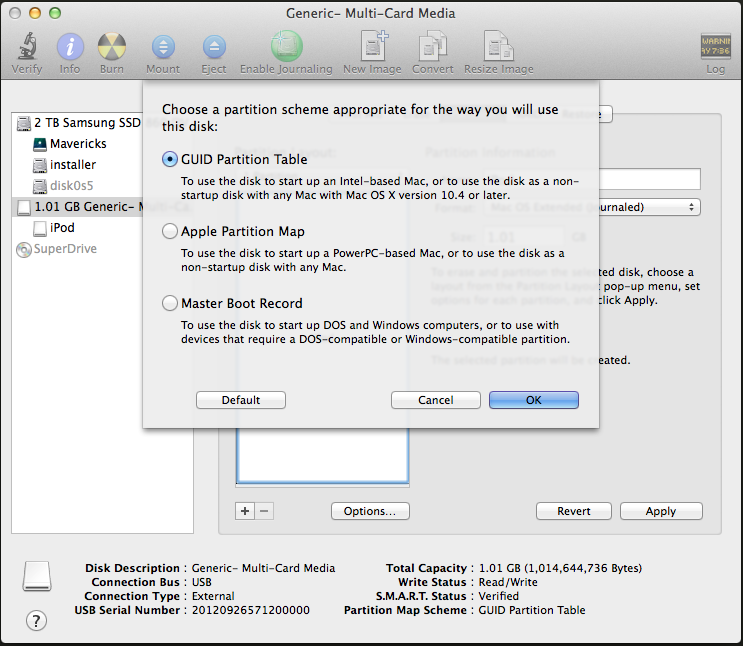
- Connect your storage device to your Mac and open Disk Utility.
- In the device list, select your storage device and click the "Partition" option.
Click the "Options" button so you can select a partition scheme to use. - Select "GUID Partition Table" and click "Ok"
- Back in the main view of Disk Utility, select "Format" and choose "Mac OS Extended (Journaled)".
- Click "Apply" to format your storage device
Setting up your iPod
- After formatting your storage device install it inside the iPod.
- Boot the iPod before plugging it into your Mac, and when you see the Apple logo plug it in.
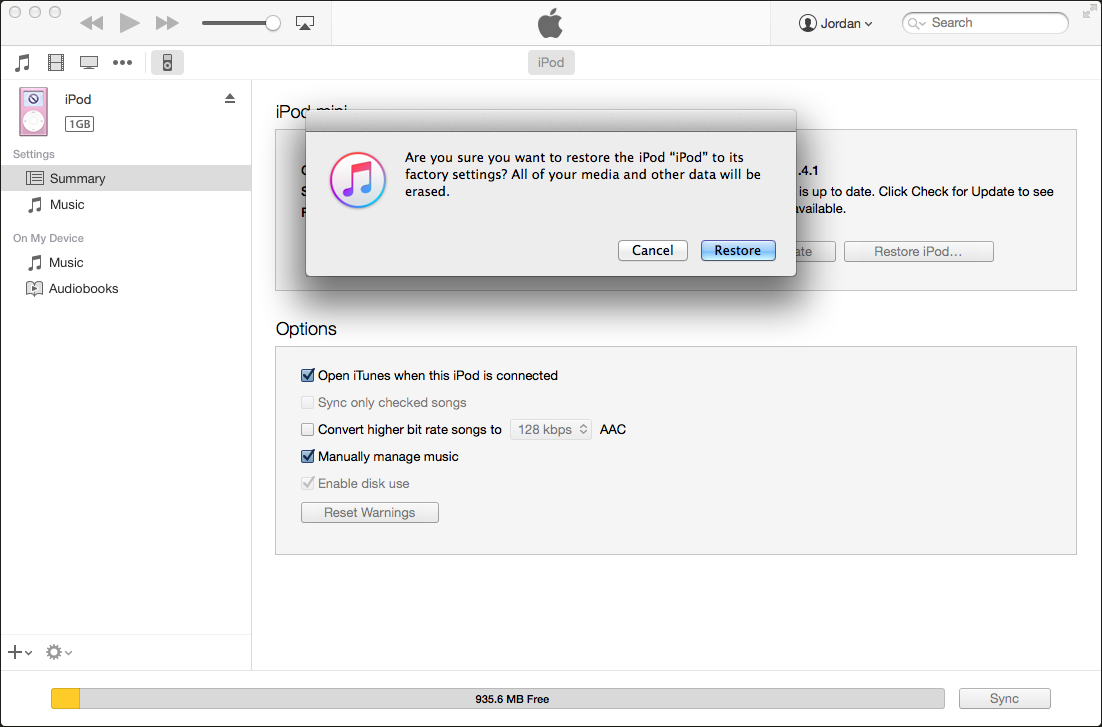
- iTunes should hopefully open and recognise the iPod. You should then restore the iPod within iTunes to make sure it's got a clean install and has the latest system installed.
If iTunes doesn't recognise the iPod, or if it's stuck in a boot loop follow the restoration steps below.
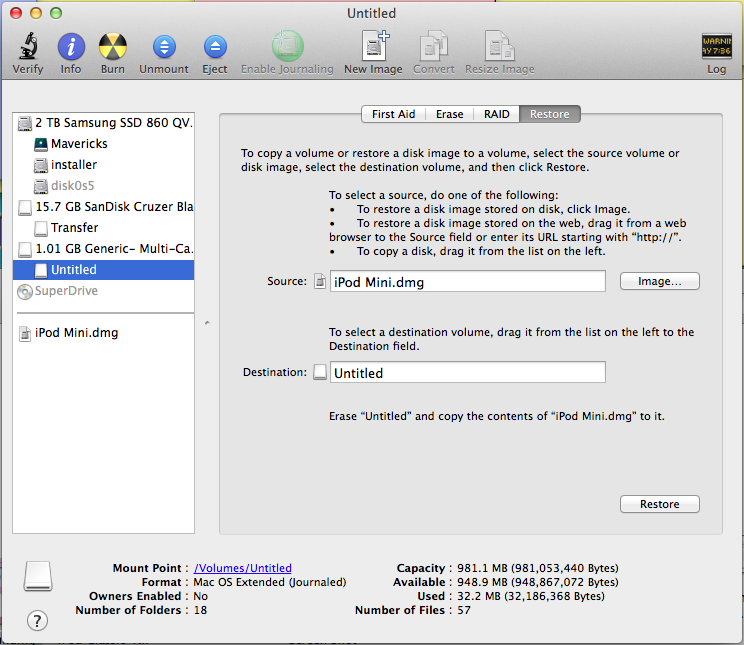
Restoring from an iPod disk image (Optional)
- Make sure you have formatted your storage device following the steps above, and connect it to your Mac (while not installed in your iPod).
- Download a restore image below corresponding to your iPod model.
- Within Disk Utility select the "Images" menu within your system's menu bar, then select "Scan Image For Restore".
- Select the iPod restore image you've down downloaded.
- When the scan is complete click the "Restore" option.
- Set the source to the scanned restore image.
- Set the Destination to your storage device's volume.
- Click the "Restore" button, and repeat the steps listed under "Setting up your iPod".
Partitioning a Storage Device |

Formatting a Storage Device |
Restoring from an iPod disk image |
Restoring through iTunes |
Post a Comment